Showing posts with label tablerunner. Show all posts

Tuesday, May 10, 2016

Making a table runner from left over layer cake pieces

52 Week UFO Challenge - Project #25 - "It's Been A Slice" leftovers

The layer cake that I had used for my "It's Been a Slice" quilt pattern had 42 - 10" squares BUT my pattern only uses 40. As a result I had the equivalent of two 10" squares (and some pieces of sashing and outer border) left over. Since they all coordinated I didn't want to throw them out.

Left over pieces from my "It's Been a Slice" quilt
I decided to sew the triangles together along the LONG sides and then used my Quilt In A Day Square up Ruler  to make half  square triangle blocks. I'm not big on specialized rulers but I LOVE using this one to make half-square triangle blocks. You can use odd sized pieces of fabric, sew them together with a straight line and then use this ruler to cut them into an accurate block. 

The ruler in action

My half square triangle blocks

I sewed the little blocks together to make two larger blocks, then added sashing and a 3" outside border. This ended up being the perfect size for a table runner.


I used a meander stitch to machine quilt the blocks, a back and forth design on the inner border and then a swirl design for the outside border. A little navy blue binding finished it right off!!
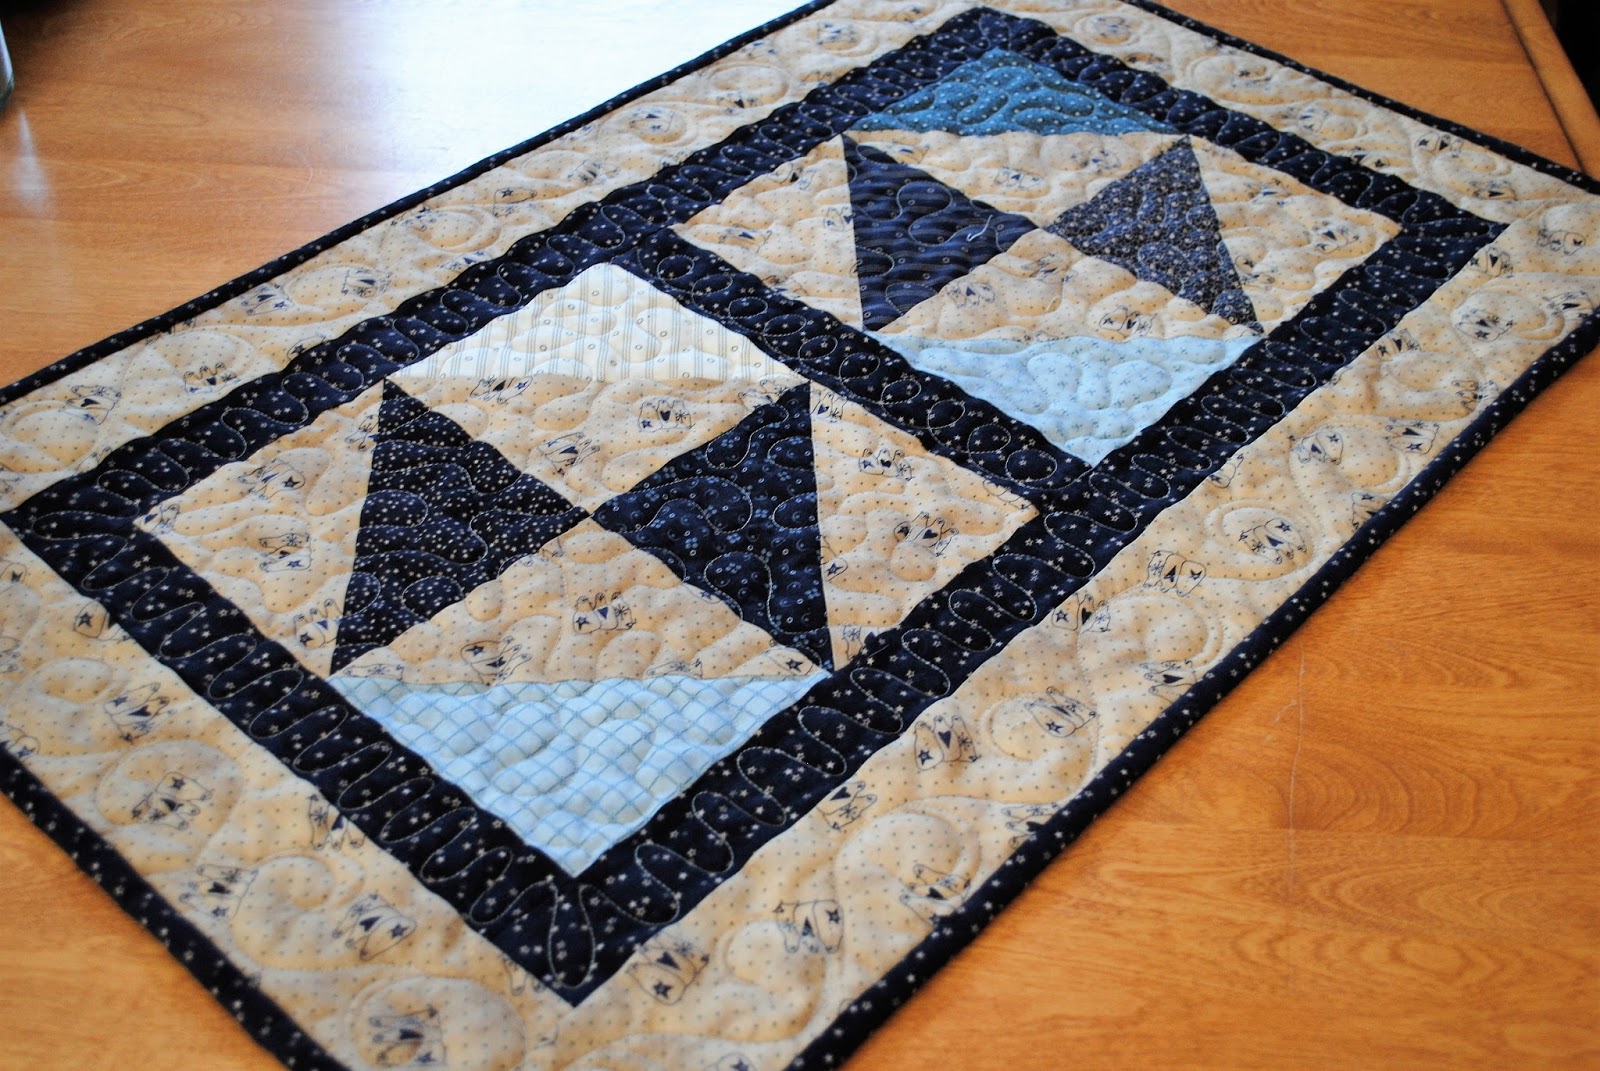
This little table runner turned out so cute and was really easy to make! Now maybe you too can try making a table runner from left over layer cake pieces or ANY little leftover pieces of fabric that you have from another project. Get one of the Quilt In A Day Square up Rulers and you'll be making half square triangle blocks from ALL of your leftovers!!  


The finished table runner

Tuesday, May 3, 2016

Disappearing Twice Nine Patch Table Runner

52 Week UFO Challenge Project #23 - Disappearing nine patch table runner

I had four blocks left over from my disappearing nine patch quilt so, of course, I saved them and wanted to use them for another project.

Unfortunately, none of the ways I arranged the blocks looked right.


So I decided to cut up each of the blocks to see what I could do with them. I cut the block in half from top to bottom and from side to side.

The block sliced into four sections
Next, I rotated each of the sections and rearranged them until I liked the way the block looked.
Sections rotated and rearranged
I sewed the four blocks together with navy blue sashing strips and then added a blue border. I just LOVE this method of making a complex block from a nine patch block. Making the nine patch disappear TWICE was a great way to make the blocks look different for the table runner.

To quilt the table runner I used an alternating swirl design for the outer border and a meander on all of the blocks. Fast, simple and effective.

Close up of quilting designs

My disappearing twice nine patch table runner is project #23 in my 52 week UFO Challenge. It has been 16 weeks since I started my challenge and I can't believe how many projects I have been able to finish up!!


The finished table runner

Thursday, March 3, 2016

52 Week UFO Challenge - Project #12 - Hexagon Table runner


LAST March I started sewing 1" hexagons together by hand just so I would have something to work on while I was on vacation in Florida. Last August I posted some Tips for Hand Sewing Hexies and now FINALLY I am finishing my hexagons into a table runner.

One of the reasons that it took so long to finish this project was that I really wasn't sure HOW to finish it. I didn't want to bind around all of those corners and I didn't want to cut off any other edges to make the sides straight. Finally I thought of a solution - I would appliqué the hexagons to a background fabric. After trying a few different ones, I decided on a Stonehenge light grey.

My finished hexagons previewed on a grey background.
The next step was to remove all of the hexagon templates from the back of the pieced runner. First I pressed the piece really well to make sure that the edges were nice a crisp.

The hexagon templates.

Popping out the hexagon templates.

The templates have all been removed.
The next step was to use my 505 Spray to spray the back of the entire piece and then to centre it onto the grey background.
The back of the hexagons sprayed with 505 Spray.
After the hexagons were stuck to the background I stitched around the outside of entire piece to secure it to the background.
Stitching the hexagons to the background.
 My next step was to layer the background with batting and a backing. I then used my walking foot to quilt straight lines down the entire quilt.

Close-up of the quilting lines.

Straight line quilting with my walking foot.
I wanted to add a little bit of the teal to the binding, so I decided to try out the Magic Binding tutorial that I found online. That little extra teal was just what I wanted!!

The magic binding!
Here it is! The finished table runner! I just love how it turned out and now I'm thinking of other ways to appliqué pieced hexagons to backgrounds!!! And wouldn't you know it...I have MORE hexagons left so I guess that means another UFO :)

The finished hand pieced hexagon table runner.


Saturday, January 30, 2016

52 Week UFO Challenge Project #6 - Valentine's table runner

Be careful when searching your sewing room.....

So, while I was looking through my sewing room for a piece of fabric to finish off one of my other projects, I found MORE UFOs!! Not a lot (thankfully) but, I did find a few more to add to my list.

Two of the things I found were these embroidered hearts similar to the ones that I have already finished off as ornaments, but since these two matched I've decided to make a Valentine's table runner with them.


One of my favourite Accuquilt dies is the Studio Tongue Rug die!! I LOVE making wool projects but I HATE cutting tongues for penny rugs and wallhangings so I was super excited when I found this one on their website!!

Accuquilt Studio Tongue Rug Die
I also love to scour thrive stores and garage sales for wool clothing that I can felt. Sometimes the article of clothing feels like wool, but their is no tag so you take your chances as to whether it will felt or not. This one was a skirt but unfortunately it didn't felt very well, so I've had it in my cupboard for awhile with no idea as to what to do with it.


Since this wool isn't felted, I need to finish the edges with a pillowcase turn. I've never done that with any of my wool projects, so now is a good time to try it out!

First I had to cut my background wool and appliqué my heart hexagons onto each end. I used my 
505 Spray to secure them before I did the hand blanket stitching around the hexagons.

I made my tongues (using my handy, dandy Accuquilt Tongue Die) and then I pinned them face down on the ends of my table runner - pointing IN to the middle.

I cut a pieces of black fabric the same size as my wool background and pinned it the top.


I stitched around all of the edges with a 1/2" seam, but left a small opening for turning.


Next step was to clip the corners since the wool is very bulky, and to turn the runner right side out.

The tongues after the runner is turned right side out.
Next, I used my machine to top-stitch all of the way around the runner to flatten it a bit and to close the opening that I had left for turning. A little press afterwards made it lie nice and flat.


Here it is - all finished and on my skinny front hall table, I'm all ready for Valentine's Day 
The finished Valentine's Day runner.


Monday, January 18, 2016

52 Week UFO Challenge - Project #3b Quilt-as-you-go tablerunner

Using up the Wilderness Lodge leftovers

After trimming up the Wilderness Lodge animal squares I was left with all of these triangular pieces and OF COURSE I couldn't just throw them away!


I've decided to use these triangular pieces to make a table runner and instead of piecing them together, I'm going to use the "sew and flip" method of quilt-as-you-go.

First step is to cut the background and batting and use my 505 Spray to baste them together. Next, I drew out a grid so that my pieces will stay straight as I keep adding them on.

The first piece is placed wrong side down, lined up on the batting and then pinned.


The next piece is placed on top of the first piece right side down and pinned in place. then I stitched along the edge through all four layers.

The first two pieces are sewn to the batting and backing.

The top piece is then flipped so that right side is up and pressed. I then decided to add skinny strips of black fabric in between the pairs of triangles. Then I kept adding the pairs of triangles and black skinny strips until I used up all of the triangles.


Next, I used a sharpie marker to draw a straight line along both long sides of the table runner and then placed one of my inner border strips along this line right side down and pinned.


One of the inner border strips pinned in place.
 After both long inner border strips were sewn down, I flipped them right side up and pressed, then added the short inner border strips to the remaining two sides. I added the outer borders in the same manner. Once the borders were on, the table runner was all quilted and ready to binding. Here is it - all finished!!

The finished table runner.


Saturday, December 26, 2015

A year's worth of unfinished projects!

Happy Boxing Day!!

In the midst of holiday preparations I found a couple hours to clean and tidy up my sewing room. The wrapping paper was put away for another year and the remains of my pre-Christmas projects were tidied up. 

While I was doing this I found a staggering number of projects that were in the throws of being finished - my UFO's. They aren't all big projects (one is a pincushion) but they are all started and not finished. Some are extra blocks from a quilt that has already been made, but I couldn't bring myself to throw away - these I'm going to use to make table runners, book covers or bags. Some are punchneedle pieces that I did for demonstration purposes at quilt shows or in a class I was teaching, but never finished into a wall hanging or pillow. Some are are quilts that have been put aside while I quilted for customers and some are actual projects that I intentionally started and have yet to finish.

 For each project I found I put the blocks/pieces and corresponding fabrics together in either a large zip-loc bag or a basket.

All of the projects neatly stacked and ready to finish!!


I then got out my new Passion Planner and wrote out the list on a blank page at the back. After I had written them all down, I realized that I had 26 projects that I should finish up. I also realized that this number conveniently divides into 52 weeks, so I now have given myself a challenge - to complete one of these projects every 2 weeks for all of next year!!
I LOVE making lists - it's so satisfying to check things off as you finish them!


One of my new year's resolutions each year is to blog on a more consistent basis, soooo...part two of this challenge is to document all of these projects in my blog. Maybe this will inspire others to take a fresh look at their unfinished projects and maybe complete a few!!

So here's to 2016 and the "52 week UFO challenge"!!