Friday, July 22, 2016

Machine quilting my orange poppy wall hanging

52 Week UFO Challenge #34 - Poppy wall hanging

Back in 2006 - yes TEN YEARS AGO - my mom and I attended Quilt Canada in Ottawa and took a course on creating pictorial flower quilts from a photo. I wish I could remember the name of the technique we used or who taught the class, but the handouts we received are long gone (or lost somewhere in the depths of my sewing room).

My flower applique was finished shortly after we came home from the conference, but I never knew how I wanted to border and quilt it, so I tucked it away and was surprised when I found it back in December!


I have quite a collection of batik fabrics - all housed in this shoe organizer. I LOVE batiks, and always seem to be adding to my stash. I figured that was a good place to start when looking for border fabrics for my poppy.


I picked out a few to audition...


And ended up picking a black batik for the inner border and two different orange prints for the outside border.


Once I got it loaded it on my Gammill, I had fun doing lots of machine quilting on the flower and  background.


Here is a view of the back of the wallhanging showing some of the machine quilting.


Here is the finished project. I really love how it turned out and really can't believe that it took me ten years to finish it. Good thing I started my 52 week UFO challenge!! Project #34 is done!!


Tuesday, July 19, 2016

Using left over tumbler blocks to make a table runner

52 Week UFO Challenge - Project #33

I have made quite a few projects using my Accuquilt Tumbler Dies. I have both the 3 1/2" and 6" size dies and find that they are AWESOME for making large and small projects. 

I used the larger die to make the Tumbling Waters quilt for A Needle Pulling Thread magazine and (just like always) used my die cutter to cut up the leftover fabric into extra pieces. 

A Needle Pulling Thread - Fall 2015
I used some of these small tumbler shapes to make a pillow - Project #27 in my 52 Week UFO Challenge.  But I still had many more left over, so I randomly sewed them together into four rows of 15 tumblers each. I then sewed these rows together and trimmed the ends of the table runner straight. I popped it onto my Gammill and quilted it with gentle curves from end to end. This quilting design is fast and easy to do - even with a walking foot on your home machine!!


After trimming off the excess backing and batting I got out my binding box and found one that would work perfectly. If you are looking for tips on tidying up (and using) extra binding strips check out my blog post on March 22nd.


Picking a binding

Here it is - the finished table runner. Doesn't that make you think of tropical waters!! Project #33 is done AND I've finally used up ALL of those tumbler blocks!!


Thursday, July 14, 2016

Using Tsukineko inks to fabric paint daisies

52 Week UFO Challenge - Project #32

A couple years ago Nellie and I took a surface design course with Elaine Quehl and one of the supplies we learned to use was Tsukineko Inks. These inks are so amazing to work with and one of the coolest things about them is how you can dilute them with aloe vera gel to make different shades of the same colour.

I used these inks to paint these daisies on white cotton fabric soon after taking Elaine's class, but then it ended up in my UFO pile.


I decided to make a wall hanging out of it and set to work picking borders.

Border option 1

Border option 2

Border option 3
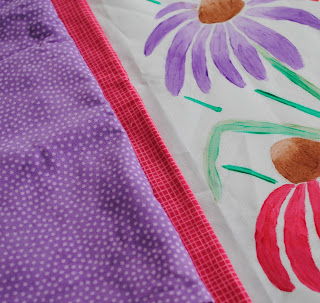
I settled on this fabric combination of a purple batik outer border and a fuchsia inner border.


Once the borders were on, I mounted it on my Gammill and got to work quilting it.


A matching fuchsia binding and a hanging sleeve on the back finished the wall hanging off quite nicely!! Now that I've finished this piece off, I can't wait to do some more fabric painting with my Tsukineko Inks!!


Project #32 in my 52 week UFO Challenge is complete! What will I finish off next???

Monday, July 11, 2016

Drunkards Path table runner

52 Week UFO Challenge - Project #31

When I blogged for QUILTsocial last August I made this drunkards path table runner using my Accuquilt Drunkard's Path 7" Die and my Studio cutter.  I LOVE my Accuquilt Studio Cutter and use it all the time! I especially love using it for cutting curved piecing blocks as I would NEVER cut blocks like this using templates.


Pugsley, our Jack Russell Terrier

Close-up of the gentle waves machine quilting

One "problem" with using my Accuquilt Studio Cutter is that it is WAY to easy to cut too many pieces! As a result, I often cut more than I need and then I end up stashing them away for another project. Well, this one was no exception and as a result, four drunkard's path blocks were in my UFO pile. 

Since I've been sewing with the Northcott ColorWorks Concepts fabrics so much lately, I just knew that the flying geese stripe would look amazing with my blocks!! I sashed the blocks in the royal blue fabric and then used the flying geese in the outside border.


I machine quilted the table runner using straight lines from end to end and I really like how it turned out! I love using up leftover blocks to make other projects!!

I am half way through the year and Project #31 of my 52 Week UFO Challenge is done!! I think I'm going to have no problem at all getting all of my 52 UFOs done. Hopefully you have been able to finish up some of your UFOs too!


Saturday, July 9, 2016

Quilting with Selvages

I started saving my selvages just a few months ago after I noticed more and more projects being made by other people using their selvages.


If you aren't sure what the selvage is, it's the edge of your quilting fabric. There are two selvages on each fabric, one of which has the fabric information (designer, colours used, fabric # and manufacturer) printed along it.


These strips can be quite colourful and have one edge which is finished, so lots of quilters have started using these strips to make all sorts of projects.

Since I had a little stash accumulated, when I was offered the opportunity to review a copy of "Modern Selvage Quilting" by Riel Nason, I jumped at it!!


This book has lots of projects to try and has very clear, easy to follow instructions!! Since I didn't have a lot of selvages collected, I decided to make the "Selvage Latticework Accent Pillow" on page 51. It was a fast and easy project that turned out just great!!


Now that I've read the book, I'm going to trim my selvages a little wider than I have been and I'm going to make sure that I save them ALL. I think this would be a fun class to teach at my local quilt shop too, so I'm going to ask them to order in the book!! 

If you are looking for something fun and a little different, why don't you try quilting with selvages??

Friday, July 1, 2016

July New Beginnings Block now available

New Beginnings Block of the Month


Happy Canada Day!! The July block for our New Beginnings Block of the Month program is now available on Craftsy!! This block is the ninth block for our quilt - check out Craftsy to see all of the rest - two of which are FREE bonus blocks!!

July Block - New Beginnings Block of the Month

For this block, my accent fabric is this awesome orange batik - I just love it!!


The teal batik that I used for the centre is so amazing!


Here it is - my finished July block!

July Block of the Month
Make sure that you download the General Directions on Craftsy so you can get started and be sure to upload you finished blocks so that we can enter your name into our draw for a free Northcott Quilt Kit. The more blocks you enter, the better your chances to WIN!!

General Instructions for New Beginnings BOM