 |
| My basket with projects assembled |
Wednesday, December 30, 2015
Getting organized for the 52 Week UFO Challenge
I've been looking over my projects and have sorted them into hand sewing projects and machine sewing projects. I love to have something to hand stitch while I'm watching TV so I've gone through the projects that need hand stitching to complete and have assembled the required buttons/threads/backings/tongues etc. Each of the projects is now in a separate baggie in a basket that will sit beside my favourite chair. When I have a few minutes to spare I can get working on them!!
Tuesday, December 29, 2015
Craftsy sale is on now!!
I just found out that all Craftsy supplies are up to 75% off now through 12/31!

Check it out to see if there is anything that YOU need for your UFO Challenge!
Saturday, December 26, 2015
A year's worth of unfinished projects!
Happy Boxing Day!!
In the midst of holiday preparations I found a couple hours to clean and tidy up my sewing room. The wrapping paper was put away for another year and the remains of my pre-Christmas projects were tidied up.
While I was doing this I found a staggering number of projects that were in the throws of being finished - my UFO's. They aren't all big projects (one is a pincushion) but they are all started and not finished. Some are extra blocks from a quilt that has already been made, but I couldn't bring myself to throw away - these I'm going to use to make table runners, book covers or bags. Some are punchneedle pieces that I did for demonstration purposes at quilt shows or in a class I was teaching, but never finished into a wall hanging or pillow. Some are are quilts that have been put aside while I quilted for customers and some are actual projects that I intentionally started and have yet to finish.
For each project I found I put the blocks/pieces and corresponding fabrics together in either a large zip-loc bag or a basket.
 |
| All of the projects neatly stacked and ready to finish!! |
I then got out my new Passion Planner and wrote out the list on a blank page at the back. After I had written them all down, I realized that I had 26 projects that I should finish up. I also realized that this number conveniently divides into 52 weeks, so I now have given myself a challenge - to complete one of these projects every 2 weeks for all of next year!!
 |
| I LOVE making lists - it's so satisfying to check things off as you finish them! |
One of my new year's resolutions each year is to blog on a more consistent basis, soooo...part two of this challenge is to document all of these projects in my blog. Maybe this will inspire others to take a fresh look at their unfinished projects and maybe complete a few!!
So here's to 2016 and the "52 week UFO challenge"!!
Friday, October 2, 2015
It's always a good day when I can use lime green thread!
Today I got to do the quilting on our sample of one of our new patterns - Modern Vibe. This fun and colourful quilt was made using Northcott's Colorworks Concepts fabric line and I just LOVE how it turned out. How fun would this be to make for a kids room - you could get one of the co-ordinates to make curtains and pillows!!


Our sample is heading to Houston to be displayed in the Northcott booth at International Quilt Market. I wish I was going too!!

I used a few of my favourite "modern" quilting designs to do the quilting using my lime green thread!!
 |
| I just LOVE this stripe that we used for the inner border! |
 |
| Simple quilting designs always look great on modern quilts. |

 |
| One of my favourite designs - modern boxes. |
 |
| Here it is the finished quilt!! |
Sunday, September 27, 2015
Quilting straight lines
Do you ever find yourself procrastinating with a project that you aren't sure how to finish? This happens to me too, and this month I had one that I've been postponing for WEEKS!!
Sometimes with a customer quilt I have to look at it for a few days before I get inspired by an idea for the quilting. With THIS quilt the customer specified that she wanted straight lines quilted in two of the borders, so I just had to decide how to quilt the third border and the centre of the quilt.
I came up with some ideas, but even though I knew how I would quilt it, I STILL kept finding other things to do first. My customer went on vacation for 3 weeks and I knew she would be home soon, so this week I FINALLY got it loaded on the machine, took a deep breath and started to quilt!!
It was the straight lines that were terrifying me - if they are done right, they look great, but if things aren't lined up perfectly, it could go terribly wrong!!
Once I got started, I settled into a good rhythm. My machine has vertical and horizontal locks, so I could easily quilt the straight lines in the pieced border, and I decided to mimic the log cabin design in the blocks to make a square spiral quilting design.

The outer border had a bold design, that I decided to follow with a freehand quilting design, the only lines that weren't straight.


The long straight quilting in the black border was impossible to quilt on my Gammill, so I decided to take it off and quilt it on my home machine with a walking foot.


The finished quilt is quite stunning and the back looks amazing with all of the straight line quilting!!


Sunday, September 6, 2015
A quilt of another colour

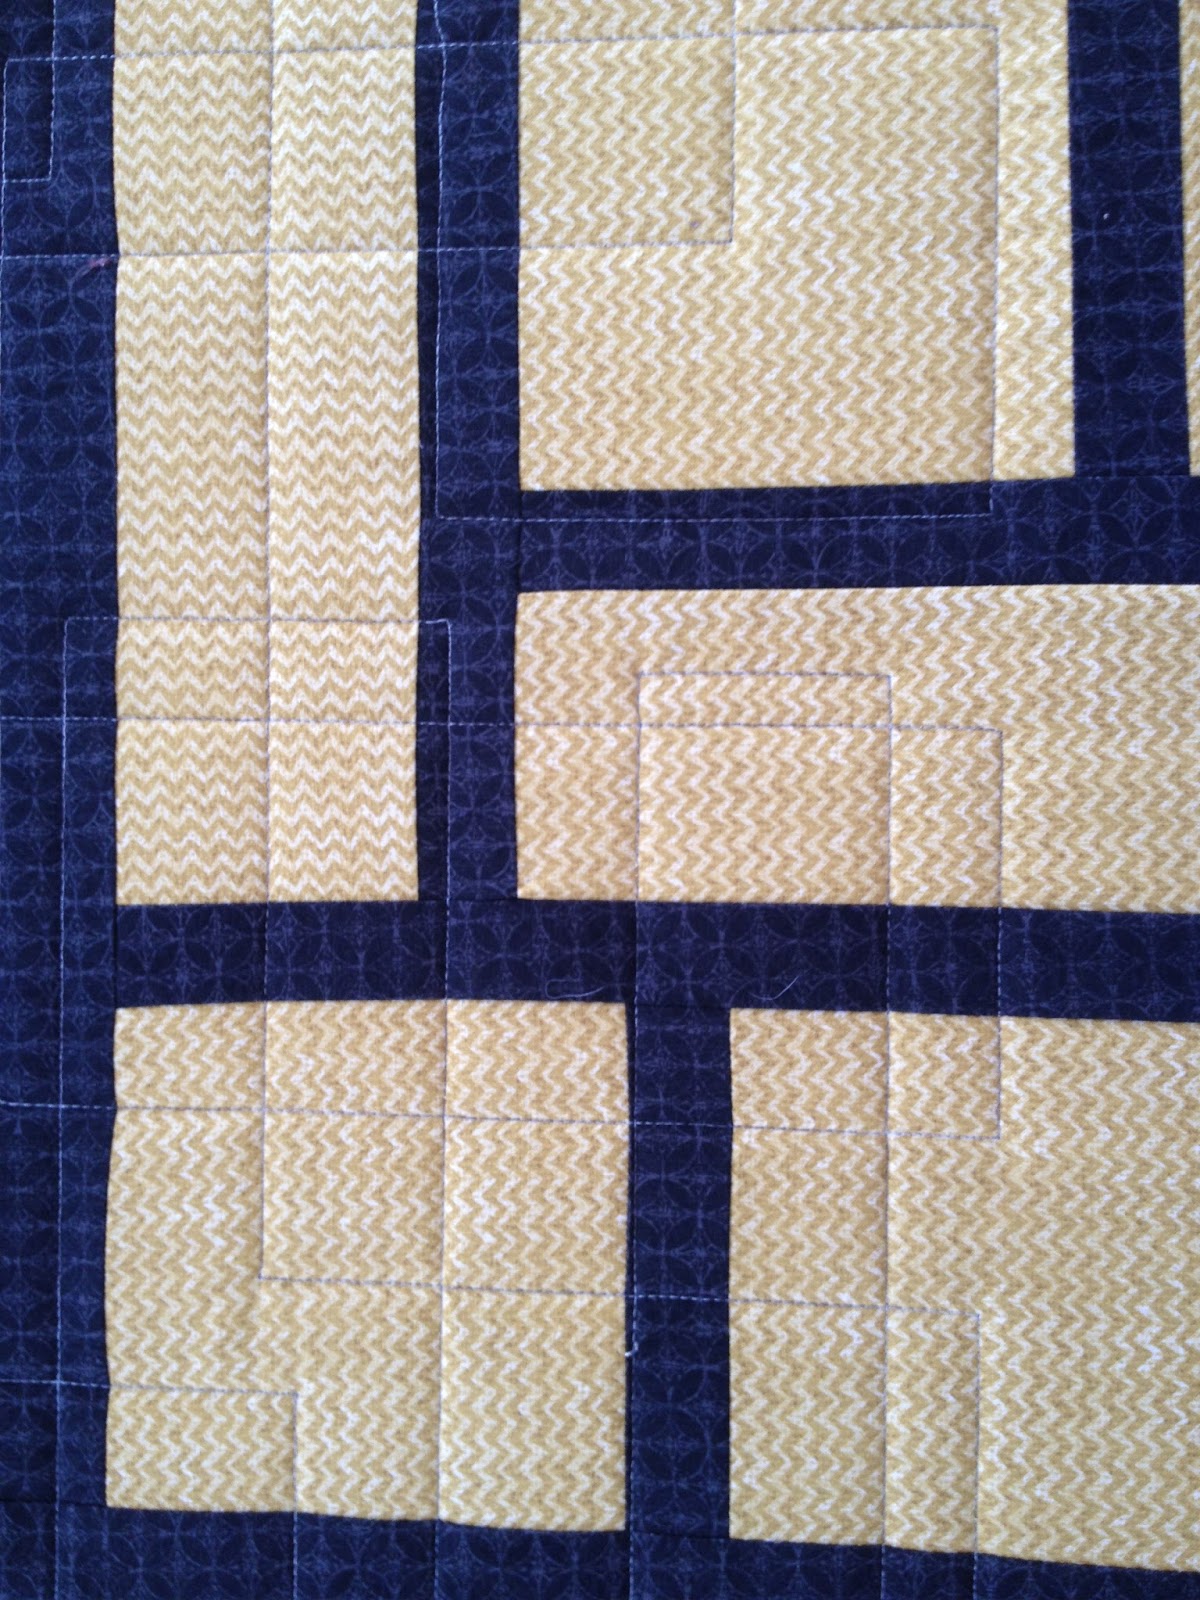
One of the BEST things about designing in quilt patterns is getting to see the quilt made in a different selection of fabrics! This pattern is called "Stella Violet", after Nellie's cute little grand daughter, and last week I got to quilt Donna Taylor's version of our pattern.

Not for the faint of heart, this quilt pattern has blocks that have 49 pieces in them, but Donna likes a challenge, so not only did she make the quilt, but she made it twice as big!! And for her colour palette she used white as a background with dusty blue, rose, pink and grey fabrics. It turned out just beautiful!!

The first challenge for me was to select the thread. This one is a very light grey which I decided would blend in with the pieced blocks but stand out nicely on the dark grey borders.

I decided to do some feathers and swirls in the pieced centre with different designs in each of the borders.
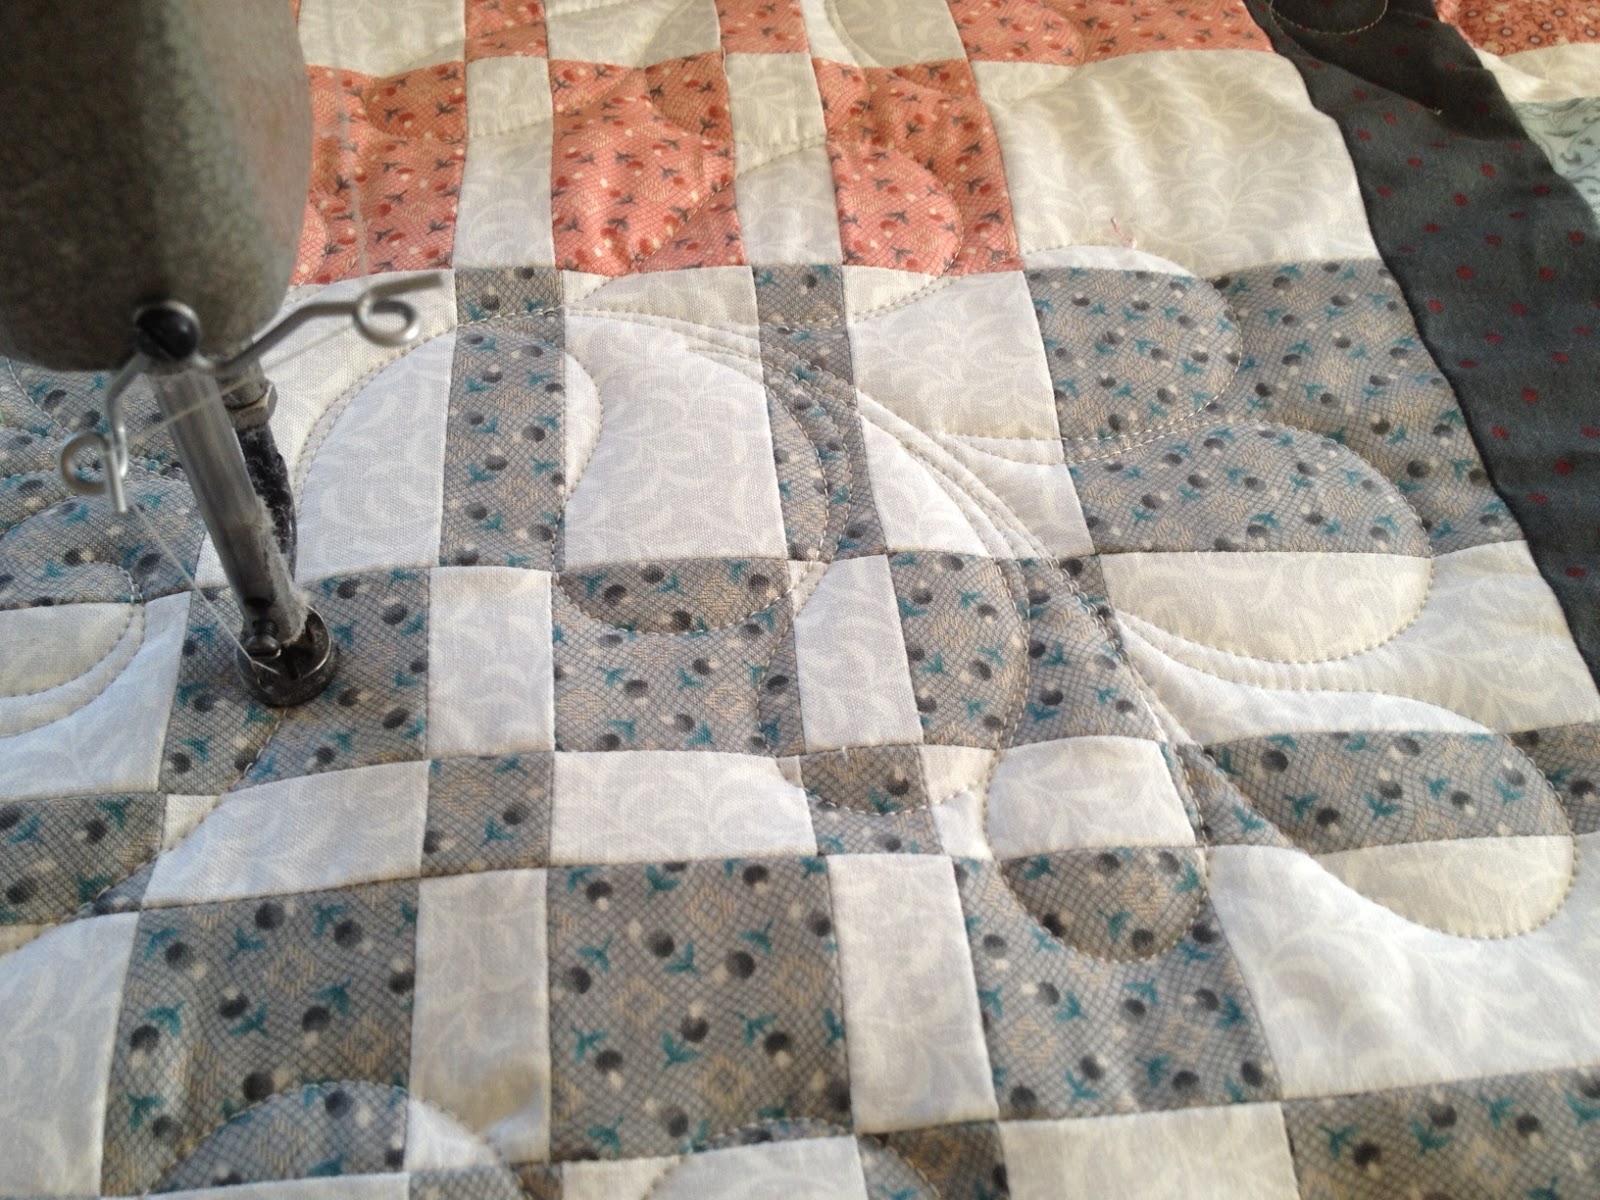
 |
| The Feather and Swirl design. |
 |
| A different design for each border. |
I always love it when I can take the quilt of the frame of the Gammill and have a look at the whole thing quilted. Here it is! I hope she likes it :)


Friday, September 4, 2015
Freezing beets the EASY way
My son Carson and I LOVE beets!! This love affair only began a few years ago, at which time we had planted some in our garden and I didn't even know how to cook them. I asked around and did some research and since then have come up with my own method for freezing beets the easy way!
This week, my mother-in-law's friend arrived at our house with two boxes of beets. I was VERY excited by this because this year our garden has been over taken by weeds and NOTHING that we planted is growing. Yesterday, I decided to deal with the boxes of beets so that I could get them off my kitchen table and into the freezer.
First step is to wash the beets and pop them into a large pot. Boil for as long as it takes for the outer part of the beets to be soft enough to stick a fork in them. The time will depend on the size of your beets but will be around 15-20 minutes.
Next, drain the hot water and add cold water to the pot. The skins should slide right off! This is a messy job, so make sure that you are wearing OLD clothes.
Next, chop the beats into chunks - it doesn't matter if you make them large or small, just be consistent so that when you cook them later on they will all cook in the same amount of time.
Next, spray a rimmed cookie sheet with cooking spray or oil. Put the chopped beets in a single layer on the tray and pop into the freezer.
Leave the beets in the freezer overnight and then take them out. Gently flex the cookie sheets and you will find that the beets pop right off and separate from each other. Scoop them up and put them into large zip-loc bags. Date the bags and put them back into the freezer.


This week, my mother-in-law's friend arrived at our house with two boxes of beets. I was VERY excited by this because this year our garden has been over taken by weeds and NOTHING that we planted is growing. Yesterday, I decided to deal with the boxes of beets so that I could get them off my kitchen table and into the freezer.
First step is to wash the beets and pop them into a large pot. Boil for as long as it takes for the outer part of the beets to be soft enough to stick a fork in them. The time will depend on the size of your beets but will be around 15-20 minutes.
Next, drain the hot water and add cold water to the pot. The skins should slide right off! This is a messy job, so make sure that you are wearing OLD clothes.
 |
| Boiled and ready to chop. |
 |
| Chopped and ready to freeze. |
 |
| My baskets are just the right height to put the trays on top. |

When you are ready to cook the beets, you can warm them in the microwave, or boil them, but our favourite way is roasted in the oven. I take the desired amount of beets out of the freezer, toss them with a bit of olive oil and then sprinkle with seasonings - the one we like the best is Chili Garlic salt from Epicure. YUM YUM!! The beets will take about 30 minutes to cook in the oven (depending on the size of the chunks). If you need to speed that time up, defrost them in the microwave and then season and pop in the oven at 350-400 degrees.

If you are a beet lover like me, or just new to beets, try out this recipe and in the middle of the winter, when you have a roast in the oven, pop in the beets and enjoy that yummy summer flavour!!
Tuesday, September 1, 2015
Upcycle an altoids tin into a sewing kit
My son has a thing for Altoids - you know those "Curiously Strong Mints" that come in the cute hinged tins.


As a result, he has quite the collection of tins in his bedroom so one night while I was on Pinterest I researched things that you could do with these tins. I have a Pinterest Board called "Altoid Tins" - check it out to see all of the ideas that are there.
Since I was going on vacation and taking along a sewing project, the pins that showed sewing kits were the ones that I found the most interesting.
First, I used Modge Podge to cover the inside and outsides of the tin with scrapbooking papers. I added a few co-ordinating buttons to the top of the tin.

Once the Modge Podge was dry, I tightly rolled up a small piece of batting and covered it with a piece of fabric. I used my hot glue gun to glue it to the inside of the tin.

Next, I found a magnet and glued it to the inside of the lid. I found some bobbins and wound them with Decobob thread and added them and some pins to the inside of the tin. Luckily I had a tiny set of scissors that I had bought at a rummage sale at our guild last year and they fit inside perfectly!

Sunday, August 30, 2015
Tips for sewing hexies by hand
Whenever I go away on vacation, I ALWAYS take along a hand sewing project. There is always down time while we are on vacation, and it is so nice to have something to work on while we are watching TV at night or driving in the car. The added bonus is that when the project is finished it will remind you of your time on vacation!
When I headed to Florida this past March I decided to take along 1 inch hexagons to hand stitch together. I had seen my friend Donna Taylor from Taylor Sewing Centre demonstrate how to use thes Mylar pieces from Brandy's and couldn't wait to try them out!! As luck had it, my Accuquilt hexagon die cut pieces that were PERFECT for using the templates. I used a stack of fat quarters that I bought from Kallisti Quilts and cut a whack of hexagons to take along.

The hexagons are very easy to use. All you do is pin each Mylar template to the back of each fabric hexagon through the hole in the middle. You then fold over the edges and tack them down at each corner with a couple sticthes.

Once all of the corners are tacked down, you can knot off your thread and stitch the next hexagon. To stitch the hexagons together, you just whip stitch the two edges together from the back.

You can sew the hexagons together into rows and them stitch the rows together using the same whip stitching method.

Months later I'm still working on this project. I took it to Blue Mountain with us this week and managed to add a few more rows. I think it will be a tablerunner when I am done, but who knows, I may just keep on sewing until it's a lap quilt!!


Wednesday, August 26, 2015
Fast and easy quilt for a "Modern" kinda guy

If you need a fast and easy quilt to make for a special guy in your life, Our Mosaic Maze pattern might just fit the bill! The large blocks feature easy piecing and go together SUPER fast. Nellie and I designed the quilt using digital images of the fabrics in EQ6, So it was fun to make the actual quilt when I went to the quilt retreat last year.
Usually I precut everything for my projects, so when I am at the retreat I can just sit and sew,sew,sew. But, this time I ran out of time and had to cut the pieces there.

Even doing that, I managed to put the quilt top together in one afternoon!!

I decided to add an additional pieced border using the fabric that was left over after cutting the pieces for the blocks. To set off this pieced border I also added a second black inner border.

When I got home from the retreat it was time to put it on the quilting frame.
I had so much fun quilting this quilt as I got to do a fun overlapping square and rectangle design using the vertical and horizontal locks on my Gammill.


My booth at the Thousand Islands Quilt Guild quilt show - May 2015

Subscribe to:
Posts (Atom)