Showing posts with label UFO challenge. Show all posts

Saturday, December 31, 2016

Finishing up the 52 week UFO challenge

52 Week UFO Challenge Projects #41-#44

Well, my 52 week UFO challenge has come to an end and I'm proud to say that although I didn't get all 52 projects done, I did complete 44 of them!! I've outlined projects #1-#40 throughout the year and here are the final four projects:

Candy cane punchneedle candle mat which was featured in last month's Primitive Quilts & Projects magazine:


Flower and bee applique block finished into a wall hanging:


Leftover quilt blocks made into a modern baby quilt:


Fairy applique block finished into a small wall hanging:


Thanks for joining me on my 52 week challenge!! I've had lots of fun making my way through all of these UFO's and have a great sense of accomplishment looking back at all of the projects that I've finished this year!!

Happy New Year!!!

Sunday, September 25, 2016

Stitching a cute little sunflower pincushion

52 Week UFO Challenge - Project #38

Sometimes the simplest things are the ones that never get done and this UFO project certainly falls into this category!! 


After finishing my "Woolen Sunflowers" table runner YEARS ago, I had one extra sunflower than I spray basted to a circle of black wool, intending to make it into a pincushion.

The little project lived in the bottom of my hand stitching project bag forever, but I have finally finished it! And it only took about 1 hour of hand stitching and some batting.

I think it's pretty cute! 


Wednesday, August 31, 2016

Finishing up the Christmas wool applique table runners

52 Week UFO Challenge - Projects #35-#37

Now that all of my tongues were cut I could start to assemble them and do the blanket stitching around the inner coloured tongues. 

The first step in this process was to use my 505 Spray to stick the inner tongues to the outer tongues. I have a special box that I use for the spraying. It is about 15" x 24" and the sides are only about 6" high so that I can spray the 505 and not get it onto the surfaces around the box. 

I laid all of the inner tongues in the box...

And then gave them a light coating of the 505 Spray.


Next step was to place them sprayed side down on the outer tongues and then to press down lightly with my hand.

I spent the next few days doing the blanket stitching around the inner tongues. I hid the knots in between the inner and outer tongues. Once they were all stitched, I cut a second set of cream wool rectangles to back the table runners and then used the 505 Spray to stick the fronts and backs together. I positioned the tongues evenly along the ends of the table runners and then slid them in between the layers of wool.


Eventhough there is some 505 Spray along the inside edges, I usually pin the tongues into place as well to make sure that they don't move.


The next step is to blanket stitch around the edges of the table runner to secure the tongues and finish the edge.

On the purple table runner I also stitched snowflakes onto each of the mittens before layering the front and back of the table runner.


Here are my finished table runners - all ready to add to my Etsy shop!! Or maybe to use as Christmas presents. Either way, finishing up the Christmas wool applique table runners was super easy and I LOVE stitching with wool.


My 52 Week UFO Challenge projects #35, #36 and #37 are all done!!


Friday, August 26, 2016

Cutting wool tongues with my Accuquilt Studio cutter

52 Week UFO Challenge Project #35 - Changing ornaments into table runners

A few years ago I participated in a local Christmas Studio Tour and one of the things I was selling was felted wool tree ornaments. I must have made 40 of them, but I ran out of time and had quite a few cut out but never finished. 


I added these to my UFO list but didn't want to just finish them as they were. Instead I cut three rectangles of my cream wool and appliqued the mitten and stocking halves onto them. 


To finish the ends I wanted to add wool tongues and I have the BEST tool for cutting all of those tongues - my Accuquilt Studio Cutter and the Studio Tongue Rug die!!


Instead of having to cut all of these tongues by hand, I just have to cut strips of wool the appropriate width and place them on the die.


Next is the cutting mat.

Then you run it through the cutter and VOILA!! The tongues are cut!


I LOVE having the option of using my Accuquilt Studio Cutter to cut my wool applique shapes!! All of these tongues were cut in less than 20 minutes! When you are making three table runners you need A LOT of tongues!!


Tomorrow I'll show you how to place and stitch the tongues...


Accuquilt Sale Aug 2016

Tuesday, July 19, 2016

Using left over tumbler blocks to make a table runner

52 Week UFO Challenge - Project #33

I have made quite a few projects using my Accuquilt Tumbler Dies. I have both the 3 1/2" and 6" size dies and find that they are AWESOME for making large and small projects. 

I used the larger die to make the Tumbling Waters quilt for A Needle Pulling Thread magazine and (just like always) used my die cutter to cut up the leftover fabric into extra pieces. 

A Needle Pulling Thread - Fall 2015
I used some of these small tumbler shapes to make a pillow - Project #27 in my 52 Week UFO Challenge.  But I still had many more left over, so I randomly sewed them together into four rows of 15 tumblers each. I then sewed these rows together and trimmed the ends of the table runner straight. I popped it onto my Gammill and quilted it with gentle curves from end to end. This quilting design is fast and easy to do - even with a walking foot on your home machine!!


After trimming off the excess backing and batting I got out my binding box and found one that would work perfectly. If you are looking for tips on tidying up (and using) extra binding strips check out my blog post on March 22nd.


Picking a binding

Here it is - the finished table runner. Doesn't that make you think of tropical waters!! Project #33 is done AND I've finally used up ALL of those tumbler blocks!!


Thursday, July 14, 2016

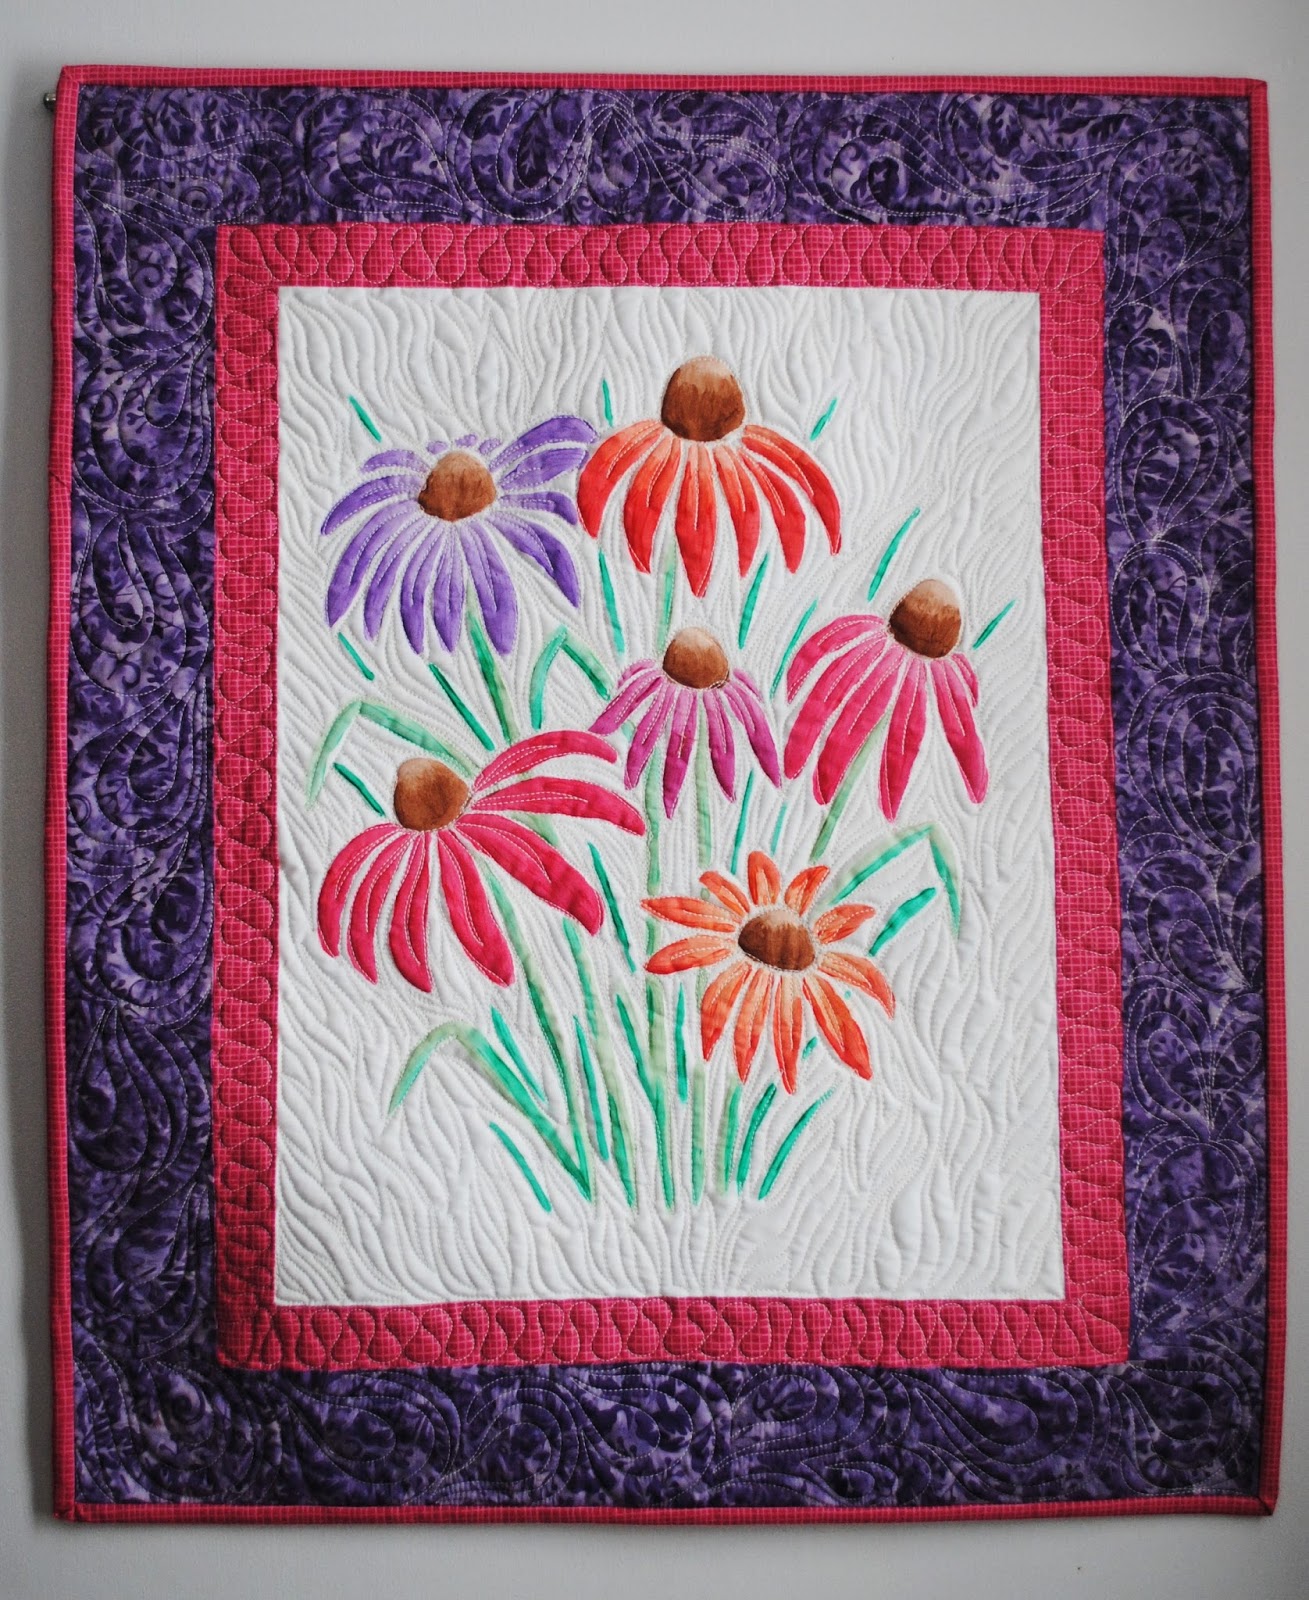
Using Tsukineko inks to fabric paint daisies

52 Week UFO Challenge - Project #32

A couple years ago Nellie and I took a surface design course with Elaine Quehl and one of the supplies we learned to use was Tsukineko Inks. These inks are so amazing to work with and one of the coolest things about them is how you can dilute them with aloe vera gel to make different shades of the same colour.

I used these inks to paint these daisies on white cotton fabric soon after taking Elaine's class, but then it ended up in my UFO pile.


I decided to make a wall hanging out of it and set to work picking borders.

Border option 1

Border option 2

Border option 3
I settled on this fabric combination of a purple batik outer border and a fuchsia inner border.


Once the borders were on, I mounted it on my Gammill and got to work quilting it.


A matching fuchsia binding and a hanging sleeve on the back finished the wall hanging off quite nicely!! Now that I've finished this piece off, I can't wait to do some more fabric painting with my Tsukineko Inks!!


Project #32 in my 52 week UFO Challenge is complete! What will I finish off next???

Monday, July 11, 2016

Drunkards Path table runner

52 Week UFO Challenge - Project #31

When I blogged for QUILTsocial last August I made this drunkards path table runner using my Accuquilt Drunkard's Path 7" Die and my Studio cutter.  I LOVE my Accuquilt Studio Cutter and use it all the time! I especially love using it for cutting curved piecing blocks as I would NEVER cut blocks like this using templates.


Pugsley, our Jack Russell Terrier

Close-up of the gentle waves machine quilting

One "problem" with using my Accuquilt Studio Cutter is that it is WAY to easy to cut too many pieces! As a result, I often cut more than I need and then I end up stashing them away for another project. Well, this one was no exception and as a result, four drunkard's path blocks were in my UFO pile. 

Since I've been sewing with the Northcott ColorWorks Concepts fabrics so much lately, I just knew that the flying geese stripe would look amazing with my blocks!! I sashed the blocks in the royal blue fabric and then used the flying geese in the outside border.


I machine quilted the table runner using straight lines from end to end and I really like how it turned out! I love using up leftover blocks to make other projects!!

I am half way through the year and Project #31 of my 52 Week UFO Challenge is done!! I think I'm going to have no problem at all getting all of my 52 UFOs done. Hopefully you have been able to finish up some of your UFOs too!


Saturday, June 25, 2016

Using the Mod Squad fabric panel to make a modern baby quilt

52 Week UFO Challenge - Project #30

Nellie and I used Northcott's Mod Squad panel from the ColorWorks Concepts line to make our Modern Vibe quilt pattern. It is a super fun, fast and easy quilt to make for someone youg (or young at heart)!


Since they usually give us extra fabric to work with, I had a second panel left over and just HAD to do something with it.

Instead of just quilting and binding it, I wanted to make it a bit bigger, so I cut rectangles and squares from the chevron fabric and sewed them together in a row with some of the white triangle print.


I then added a white strip to the right hand side and sewed this to the panel. Another white outside border finished it off and set off the colours in the panel SO nicely!!


I used my overlapping box quilting design to quilt the entire top and put a funky orange fabric on the back of the quilt.


Yellow binding looked good from the front AND the back!!


This was a fun and super quick project to make using a panel! Project #30 in my 52 Week UFO Challenge is done and this quilt is now for sale in my Etsy store.