Tuesday, January 26, 2016

Quilting a paisley design and trying out our new GoPro


A couple months ago we were lucky enough to win a GoPro video camera. We aren't a family of extreme sports fanatics so the most exciting thing we have done with it was to strap it to our springer spaniel Willow to take a video of her chasing our jack russell terrier Pugsley. I would let you see it, but it could make just about anyone get motion sickness LOL

So, today when I was out in my quilting room working on my Gammill I decided to try out the GoPro myself and did a little video showing how I was quilting a paisley design on my friend Donna's quilt. The video is OK for a first try, but the video angle is a little low (guess I should have had the head harness mount on instead of the chest one). But now I know how to charge the GoPro, switch harnesses, how to turn it on, and how to edit the video. I also figured out how to upload it to YouTube and how to put it on my blog, so I think the possibilities are endless.


By the way, my teenage boys are MORTIFIED that I would use the GoPro to video myself QUILTING!!!

52 Week UFO Challenge Project #5 - QUILTSocial Flying geese quilt

Finishing up the Flying Geese quilt

Last month on QUILTsocial I used Northcott's ColorWorks Concenpts fabric to make a quilt top. Now that my Gammill was free, I finally had a chance to quilt it!!

The first step is to load the quilt on the frame. With lap sized quilts or anything smaller, I usually just float the top instead of pinning it to the leads. So first I pinned the backing, laid the batting on top and then added the quilt top.

The next thing I had to do was to decide which thread to use. I narrowed it down to three - purple/pink, lime green and blue variegated. I decided that the purple/pink would be one!!


I wanted to do something modern and came up with this straight line design with random triangles quilted along them. Luckily my Gammill has a horizontal lock, so I just locked it to stitch the line and then unlocked when it was time to do the triangle.


Triangle Step #1 

Triangle Step #2

Triangle Step #3
This was an easy and fairly quick design to quilt over the entire quilt top. After adding some binding the quilt was done. I delivered it to Taylor Sewing Centre so it could be displayed at their open house and I'll be teaching this quilt at Taylor's in April. Check out their class list here.

Here's the finished quilt - now on display at Taylor's Sewing Centre

Another UFO checked off of my to-do list!!


Saturday, January 23, 2016

52 Week UFO Challenge Project #4b - Heart pincushion

I think I must like hearts...and hexagons...and wool LOL

 My Accuquilt Studio Cutter makes is so easy to cut wool shapes - maybe a little TOO easy as I keep finding more of these embroidery hearts!! I have many die shapes - such as the snowflake, star and hearts in my previous posts as well as bigger shapes such as the Bullseye Hexagon Die. This die is AMAZING and I've made many hexagon quilts because of it!

Accuquilt Bullseye Hexagon Die

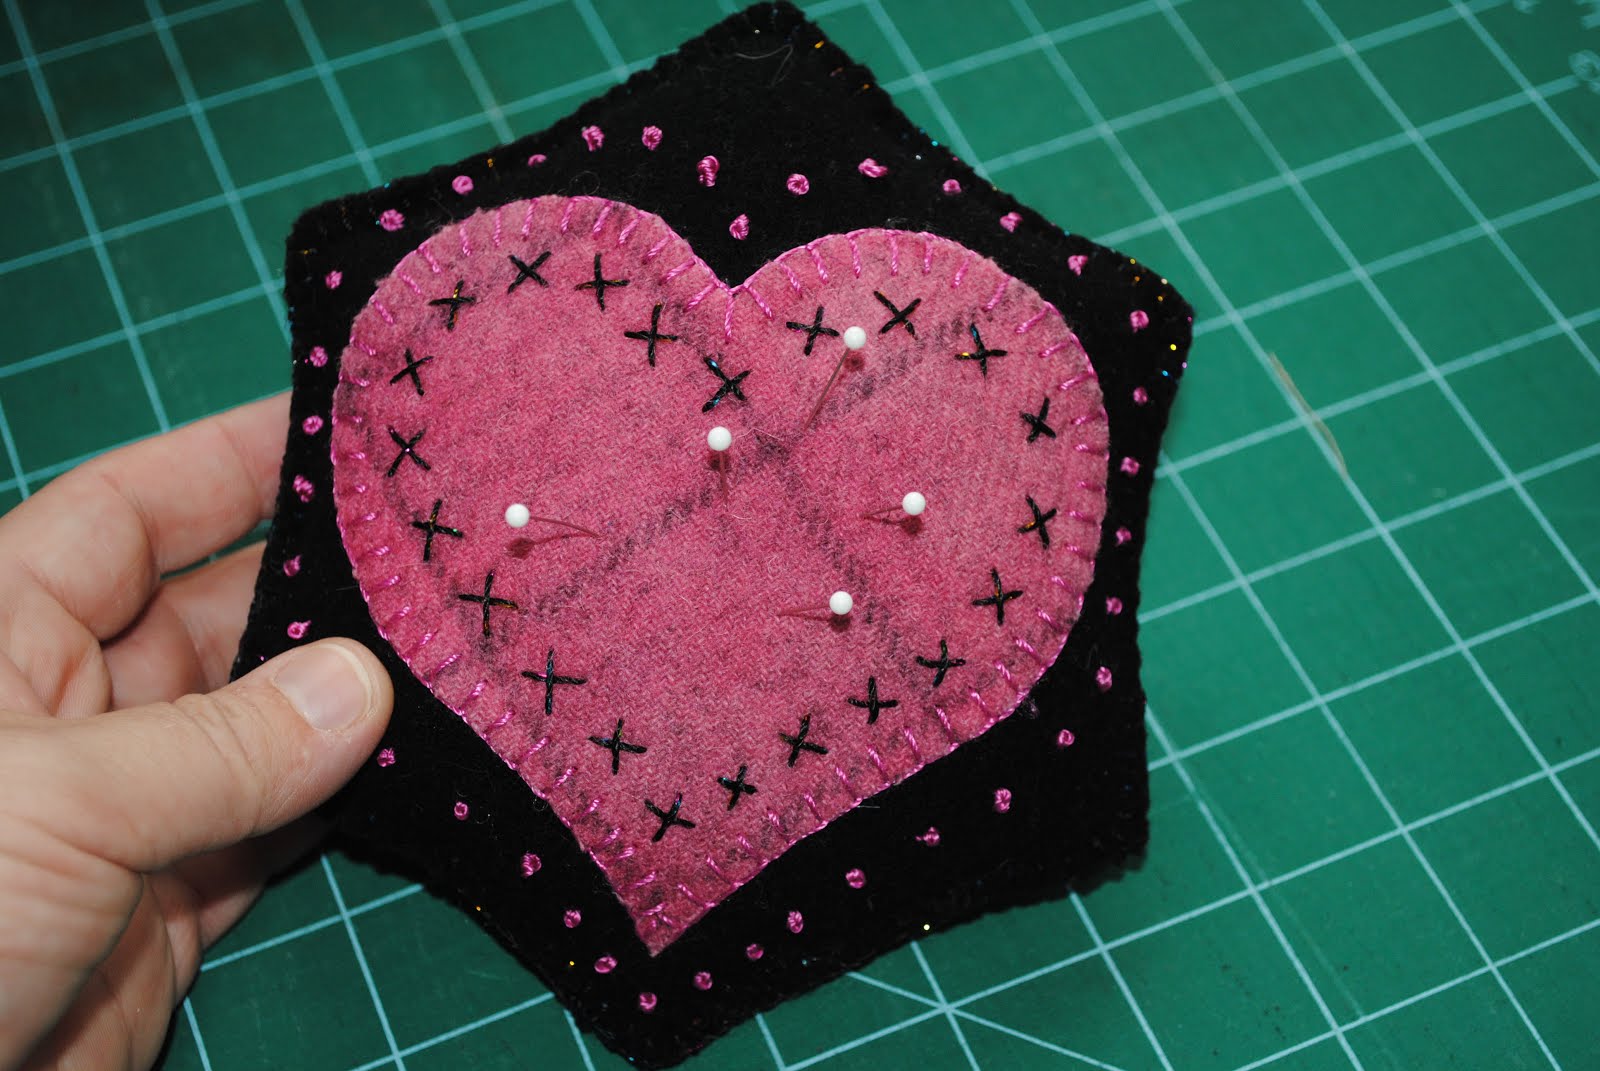
This embroidered wool hexagon made a quick little project for today. Here is a pincushion that I made just by blanketstitching two hexagons together - I left a little hole for stuffing and then blanket stitched the hole closes.
Cute little hexagon shaped pincushion


It's always nice to have a fast and easy project! Wouldn't this be a great little present for a quilting/sewing friend??

Friday, January 22, 2016

Easy homemade pizza

Friday night we like to have something easy for dinner and tonight it was one of our favourite dishes - homemade naan bread pizza.

I use my Thrive Life foods EVERY day! I have Thrive pineapple in my Isagenix shake every morning and more often than not I use some Thrive product in my dinner preparations. Our easy pizza uses LOTS of Thrive veggies. The first step is to make the pizza sauce. The tomato powder is so easy to use - just add water until you get the right consistency for your recipe. A little bit of Epicure pizza seasoning and it is ready to go.

Pizza sauce made with Thrive Tomato powder

Next up, the veggies. No washing or chopping for me and best of all...no slimy mushrooms in the bottom of my refrigerator 😃
Onions, peppers, green onions and mushrooms rehydrated and ready to use on the pizzas

Looks yummy!

The pizzas are then assembled. Too bad there is no Thrive pepperoni - maybe I'll make that suggestion some day, but sometimes I add the sausage crumbles which are very yummy!
All ready for the overn

Two of the pizzas got olives and two got pineapple and then into the oven they went at 400 degrees. After 15 minutes we had hot and delicious homemade pizza! Yum! Yum!


Wednesday, January 20, 2016

52 Week UFO Challenge - Project #4 - Embroidered Felt Ornaments


Practising embroidery stitches on the train

Two years ago, Mike and I took the train from our home town in Ontario to Halifax, Nova Scotia.
Enjoying supper on the train.

 We had a great time, the food was wonderful, the train was nice and relaxing and Halifax was so fun to explore. There was ample time to read, play on my iPad and to stitch, so I took along some felted wool, an new embroidery book and some WonderFil threads that I was testing out for QUILTsocial.

The samples that I made on that trip have been sitting in a basket ever since because I had no idea what to do with them. So I got them out and decided to finish them off in a few different ways. The first ones I finished were the circles and hexagon ones.

Some of the embroidery samples.

I decided to make them into ornaments, so I cut a matching backing for each of them with my Accuquilt Studio Cutter, and then cut a cardboard centre that was just a bit smaller. I sprayed the back side of each backing with 505 Spray and then centred my cardboard pieces on each one. 

I'm using a large flat box to do my spraying in, to protect my cutting table.
Then I sprayed the cardboard and placed the front on top. I cut a 5" ribbon, folded it in half and slid it in between the wool layers at the top of the ornament. Then I blanket stitched all around the edges of the ornament.
Embroidered hearts

Hexagon ornaments

The finished circle ornaments.