Sunday, January 17, 2016

New Beginnings Block of the Month - January

Beautiful Batiks

The January block has been added to Craftsy!!


I've decided to make my Block of the Month blocks in an assortment of batiks! I've picked a selection of fat quarters in lights (whites and off-whites), darks (navy blues), mediums (turquoise blues) and accent colour (orange and salmon).


I love making flying geese with the method that we show in the pattern, but I hate throwing away the triangles that are trimmed from the blocks. So, when I draw the diagonal line on the back of my fabric squares, I also draw a second line 1/2" from the first.


 When I sew the square to the rectangle, I sew along both of these lines.

Then, I trim between the two sewn lines and press the seam towards the darker colour.

 The little squares that are made from the cut away section are just 1 3/4" square - they will finish at just 1 1/4". With only this block I made a total of 16 of these little squares. I've put them into a zip-lock bag and will keep adding to it all year long. Who knows what I'll be able to make at the end of the year!!

 The finished flying geese ready to assemble into the finished block.

Here it is - the January block!! I just love it and can't wait to see what Nellie's block looks like!!


Saturday, January 16, 2016

A new year - a new project!

Nellie and I have challenged each other to work on our (many, many) unfinished projects or UFO's, but it's always nice to start something new too. So, we decided to do a block of the month the year and we've called it "New Beginnings".

Each month we will add a new downloadable pattern to our Craftsy site. I am doing my blocks in batiks and Nellie is going to do hers in country colours. At the end of the year we will offer two different patterns for finishing the blocks into a bed quilt.

We'd love to have lots of people working on our BOM with us, so we are going to have a contest. For every block picture that people share with us on Craftsy, their name will be put into a draw for a complete quilt kit of one of our Northcott quilt patterns. The deadline for block pictures is December 31, 2016.

The first installment of the Block of the Month is a free download and gives the generally directions for the program.


Friday, January 15, 2016

52 Week UFO Challenge - Project #3 Finishing up the Wilderness Lodge wall hanging

The borders are on - now we quilt!!

Northcott sent us bolts of fabric to make all of the projects from our book - since I have lots of the black with tan maple leaves I'm going to use it for the backing on my Wilderness Lodge wall hanging.
Backing fabrics
The quilt is loaded on the Gammill and I'm ready to start quilting. 


The outer border is quilted with leaves and swirls. 


The black inner border got my favourite alternating loop design.


Around each of the animal blocks I did a meandering stitch.


I repeated the alternating loop design around the animal squares.


In the animal squares I decided to use two of my rulers to do a curved outline and to stitch an "X" through the centre.


Her is the finished wall hanging - it even has binding on it! Project #3 is all done!!


Thursday, January 14, 2016

52 Week UFO Challenge - Project #3 Wilderness Lodge wall hanging

Celebrate Canada - our new book!!

A couple weeks before Christmas, Nellie and I spent the afternoon cutting fabrics to make the samples for our new book "Celebrate Canada".


One of the projects that I cut out was the Wilderness Lodge wall hanging. Wow - having the fabrics pre-cut is so awesome! All I had to do was to sit down and start sewing!
Everything is all cut and ready to go.
The first step is to sew the frames on to each of the nine animal squares. Five get light inner frames and four get dark inner frames.
The first step is to sew the frames on each of the animal squares.

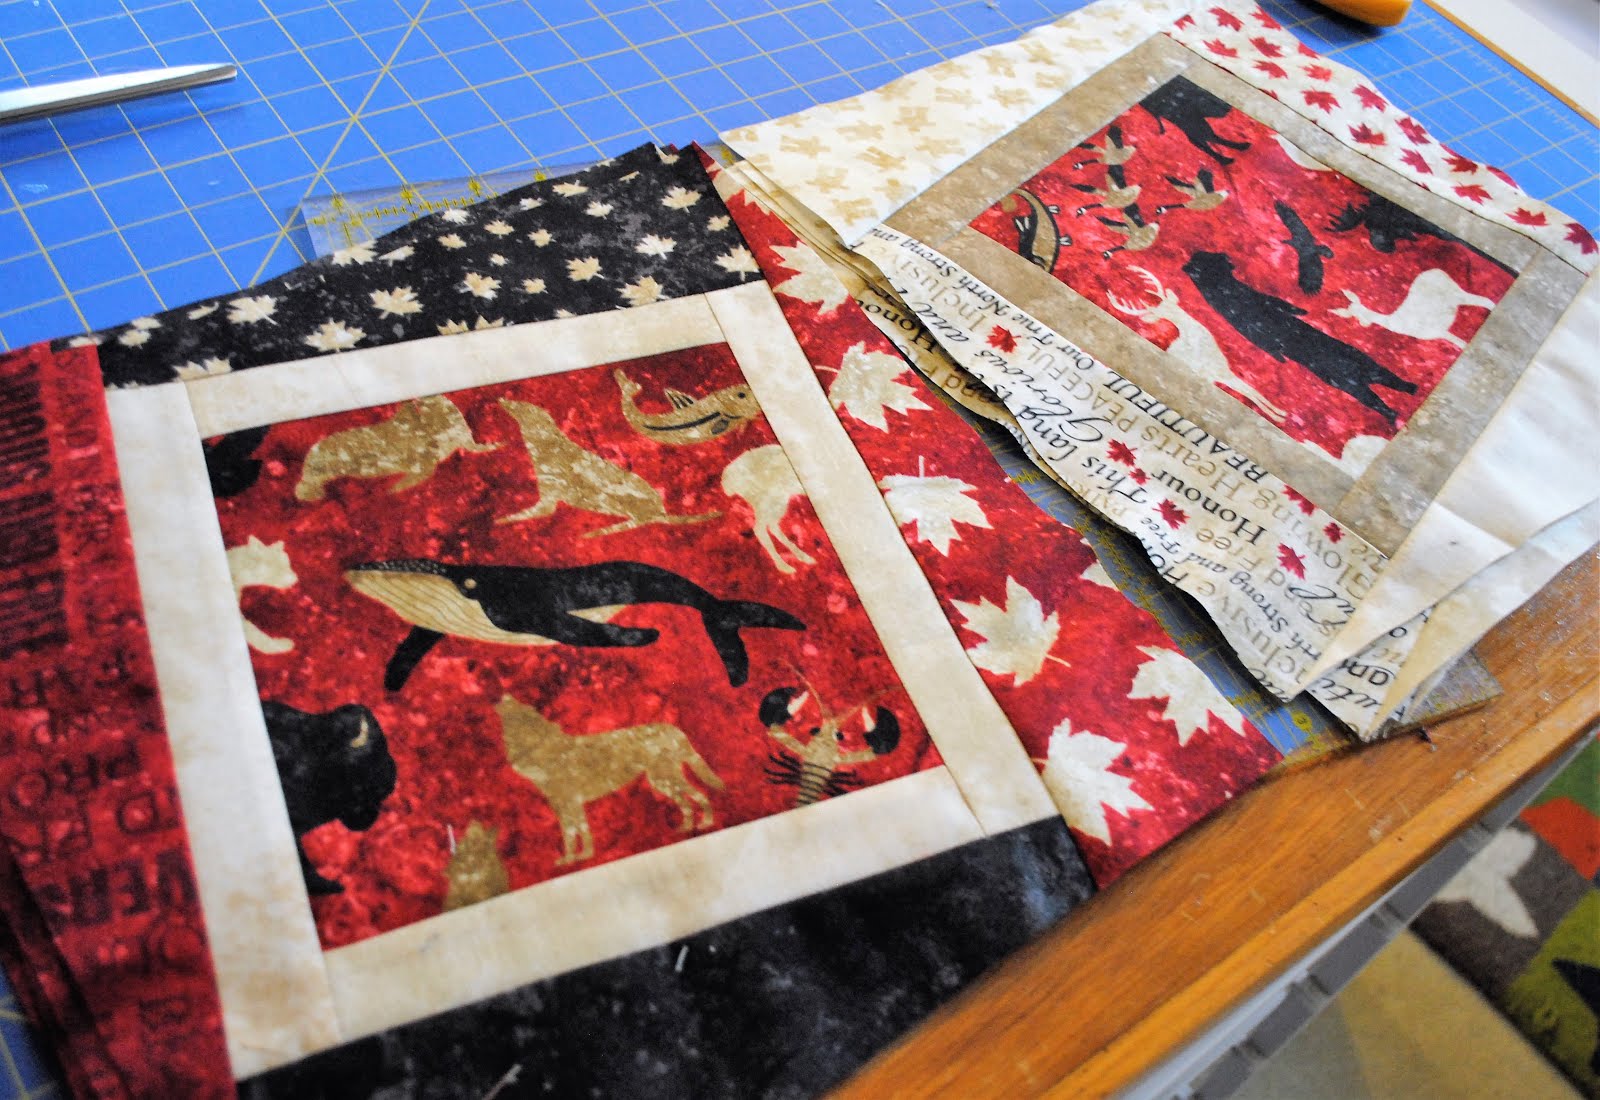
The blocks are all done!
After all of the blocks are made they have to be trimmed so that they are all on an angle using a 12 1/2" square.
If you have a 12 1/2" square it's easy to trim the blocks.
These triangular pieces must be useful for something. I'm going to set them aside and keep them for later.

Next all of the blocks are sewn together alternating the dark and light blocks.

The centre is all done - now all I have to do is add borders.

Sunday, January 10, 2016

52 Week UFO Challenge Project #2 - Planner cover

Wow - it's already the middle of January!! So I guess I better get working on the cover for my Passion Planner!!


Last week I was the guest blogger on QUILTsocial and during that week I made a lap quilt using Northcott's Colorworks Concepts fabrics. I had a few strips of the flying geese fabric left over and I desperately wanted to use it again for another project.

Northcott flying geese fabric trimmed into strips.

I think my planner cover is the perfect project to use it for!!

Making a book cover 

In September of 2014 I explained how to make a quilted book cover on QUILTsocial, so I'm going to follow the same basic procedure with this one. If you'd like more information you can check out those blog posts here.

Step #1 - pin down the centre strip

I have two strips of the flying geese stripes that already have black borders on them, so I am going to use the "quilt-as-you-go" method to sew these strips and some black and lime green strips onto my base. I'm going to use Fast-2-Fuse because the planner has a soft cover and I want to give it some substance.
I found the center of the base and then drew a vertical line on it with one of my Frixion pens. The first step was to pin down my centre black strip and then one of the lime green ones.
The centre was marked and then 2" away from each side so that I could centre my 4" strip of black fabric.


Step #2 - add fabric strips

The next thing to do was to sew down each of the green strips,then press towards the green strip. I then pinned down one of my flying geese strips (right side down) lining up the edge with the edge of the lime green. It was sewed down then flipped and presses. I kept adding the strips in this manner working from the centre out to the edges.

Step #3 - quilt

Next thing to do was to iron on my backing fabric and then to add some quilting stitches.

Ironing on the backing fabric.

I quilted a series of parallel lines on my cover.

Step #4 - Trim and make inside pockets

The next thing to do, was to trim the cover so that it would fit the planner. I usually say to lay the book out open and measure the width and the length and cut your cover so that there is an extra 1/2" around all sides (so and 1" to your measurements). I explain this in this QUILTsocial post.
The pockets on the inside hold the cover in place. Take your height measurement and cut two pieces of fabric that height by at least 6" wide. I actually cut mine 9" wide so that they were 4 1/2" wide when I pressed them in half. See my QUILTsocial post for more details.
My 9" wide fabric rectangles were folded in half and pressed and then the raw edges were lined up with the edges of the two ends of the cover and pinned in place.

Step #5 - make and apply the binding

I needed two strips of fabric 2 1/2" wide times the width of fabric for the binding on my planned. I sewed the binding to the inside of the cover, all the way around and then folded it to the front and top stitched it in place.
I sewed the binding to the inside of the cover first.

Project #2 is done!!

So...here it is the finished cover. Once the binding was one, I just slipped the front and back covers of the planned into the pockets on my quilted cover and it fit perfectly!! I especially love how the lime green strips of fabric match the lime green page marker that came with the planner. Now my planner has a custom, one-of-a-kind cover!!
The finished cover.
The lime green page marker matches the cover perfectly. The inside pockets hold the cover in place.